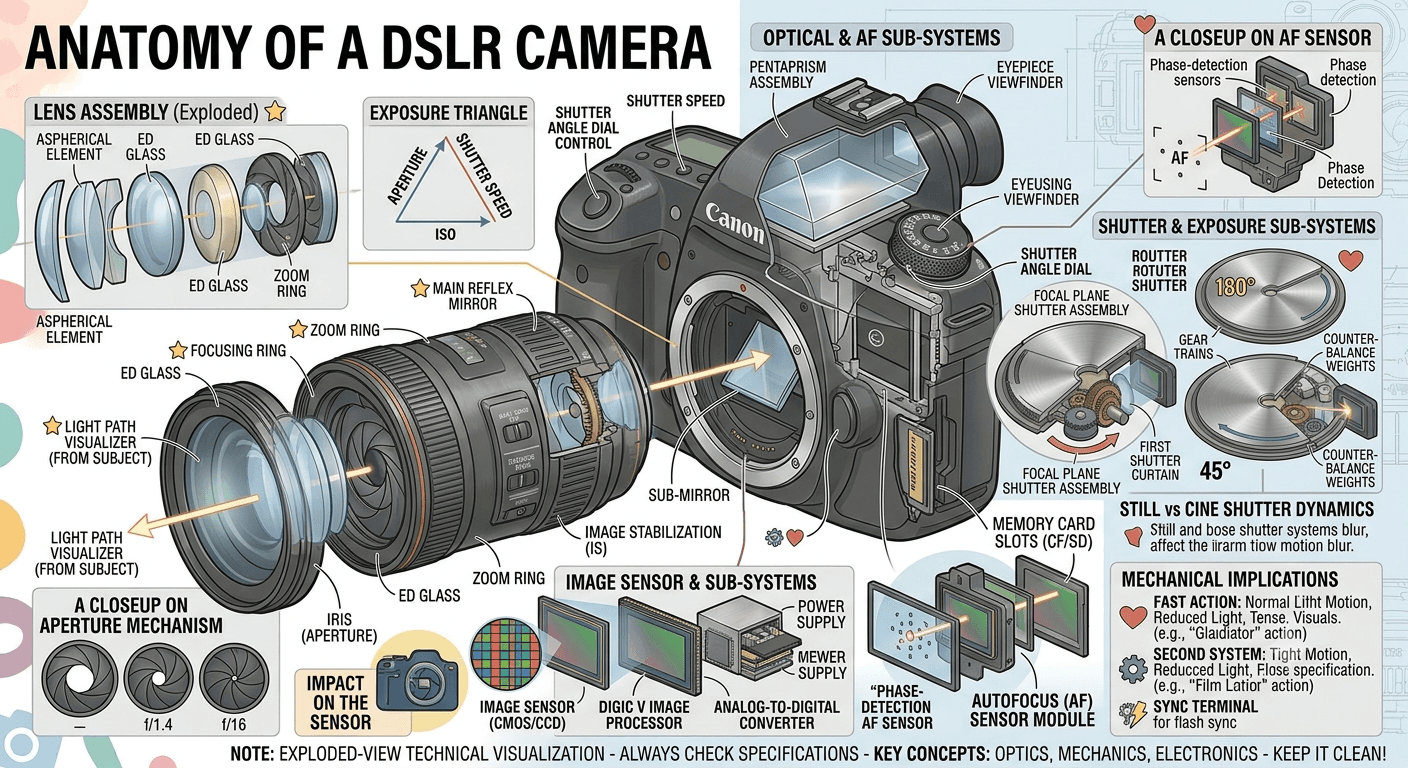
Camera Anatomy 101: Every Button and Dial Explained
Pick up a camera for the first time and it can feel like sitting in the cockpit of a plane — dials on top, buttons on the back, a wheel near your thumb, a ring around the lens, and no idea what any of it actually does.
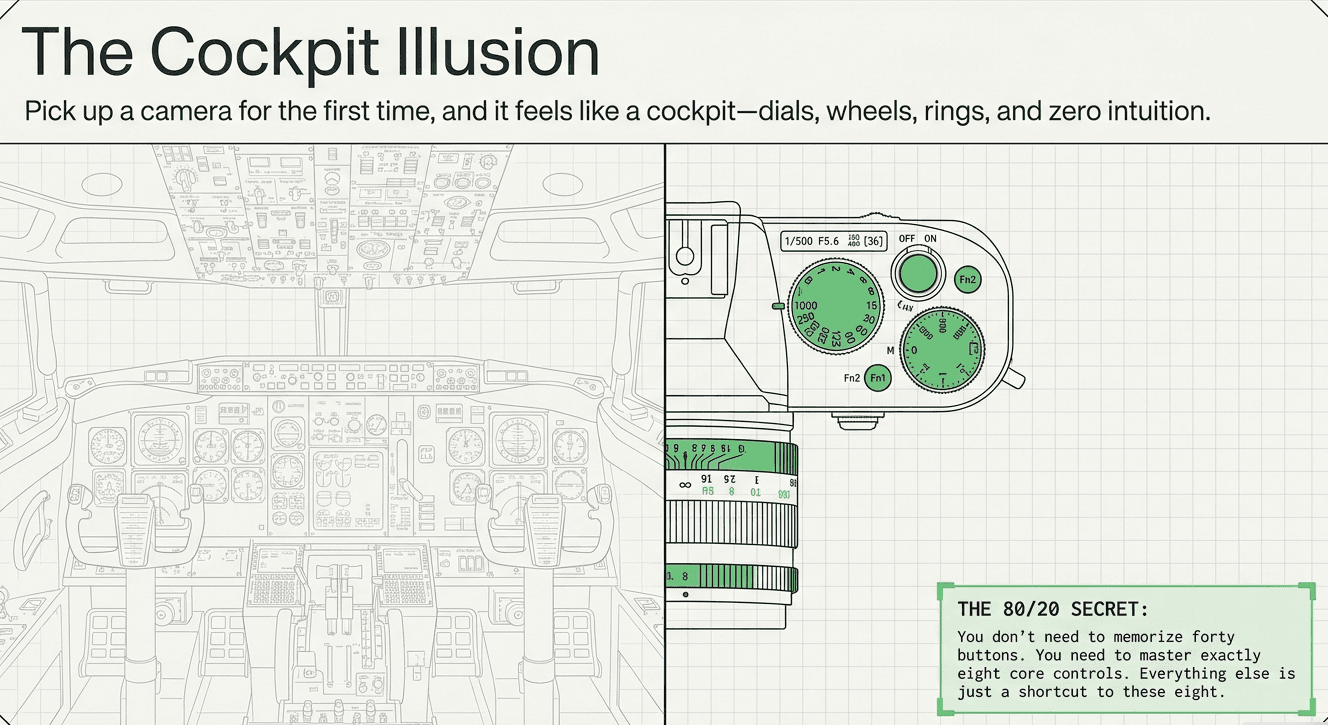
Here's the reassurance we give every new batch at Zyamaru Films Academy: you don't need to memorize forty buttons. You need to understand about eight core controls really well. Everything else is a shortcut to something those eight already do.
This module builds directly on Module 1's idea of light, lens, aperture, and sensor. Now we're locating the physical controls that manage that process.
The camera body, part by part
1. The shutter button
This is the single most important control on any camera, and it works in two stages, not one.
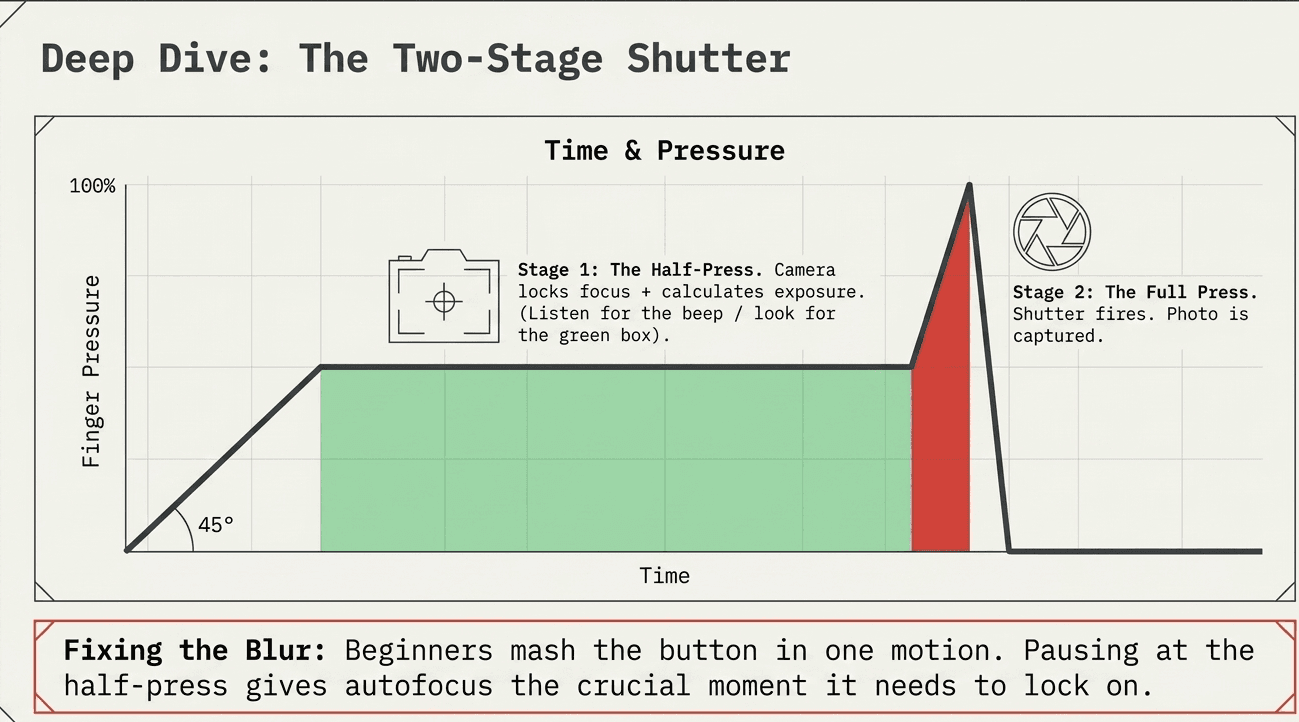
- Half-press: the camera locks focus and calculates exposure. You'll usually hear a beep or see a green focus box.
- Full press: the shutter actually fires and the photo is taken.
Beginners almost always mash the button in one motion. Learn to pause at the half-press — this alone fixes a huge share of "why is my photo blurry" problems, because it gives the autofocus system a moment to actually lock on before the shutter opens.
2. The mode dial
This dial switches between shooting modes, and it's where the exposure triangle (covered in Module 2) becomes something you control. On most cameras, you'll see:
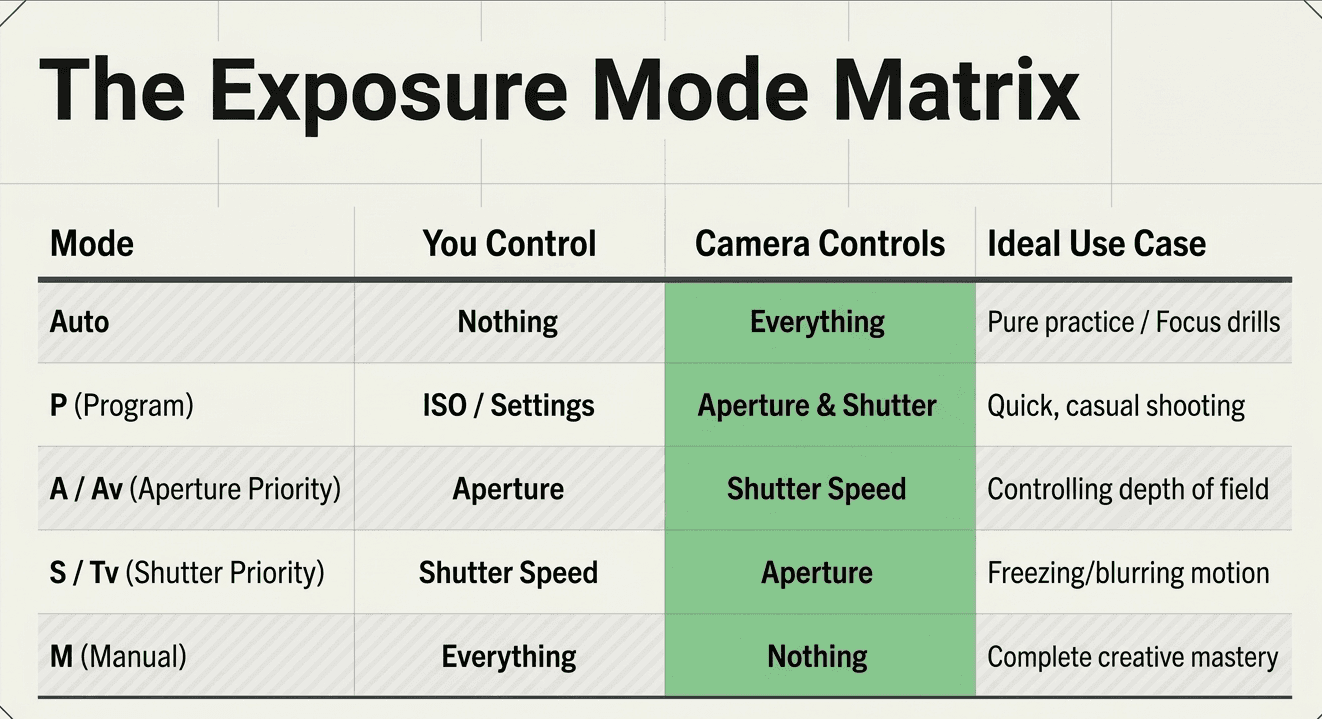
- Auto — the camera decides everything
- P (Program) — camera sets aperture and shutter speed, you control ISO and other settings
- A / Av (Aperture Priority) — you set aperture, camera sets shutter speed
- S / Tv (Shutter Priority) — you set shutter speed, camera sets aperture
- M (Manual) — you control everything
We'll go deep on when to use each of these in the next post in this series.
3. The lens mount
The metal ring on the front of the body where the lens physically attaches and locks in with a twist. Different camera brands and sensor sizes use different mount types (Canon RF, Sony E-mount, Nikon Z-mount) — this is genuinely one of the most important things to check before buying extra lenses, since a lens built for one mount usually won't fit another without an adapter.
4. The viewfinder
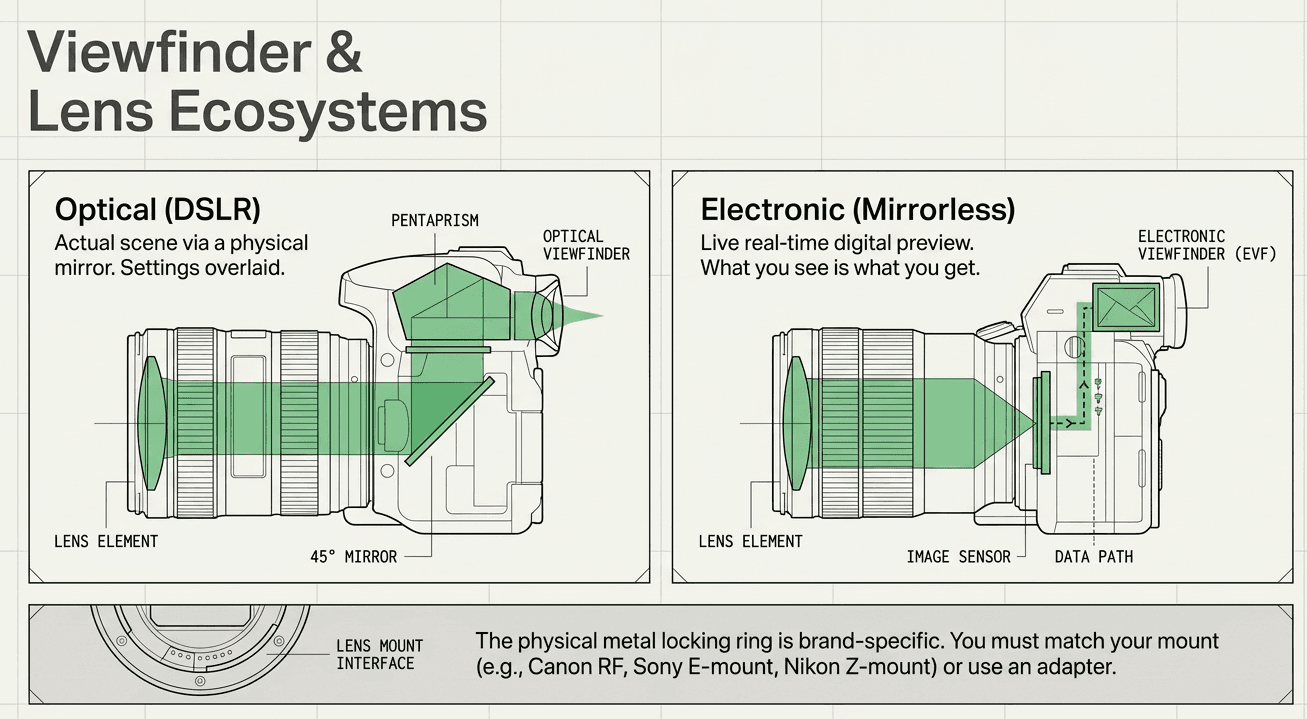
On a mirrorless camera, this is a small electronic screen you look through that shows a live, real-time preview of your exposure — what you see is close to what you'll get. On a DSLR, it's an optical window showing the actual scene through the lens via a mirror, with camera settings overlaid at the bottom.
5. The grip
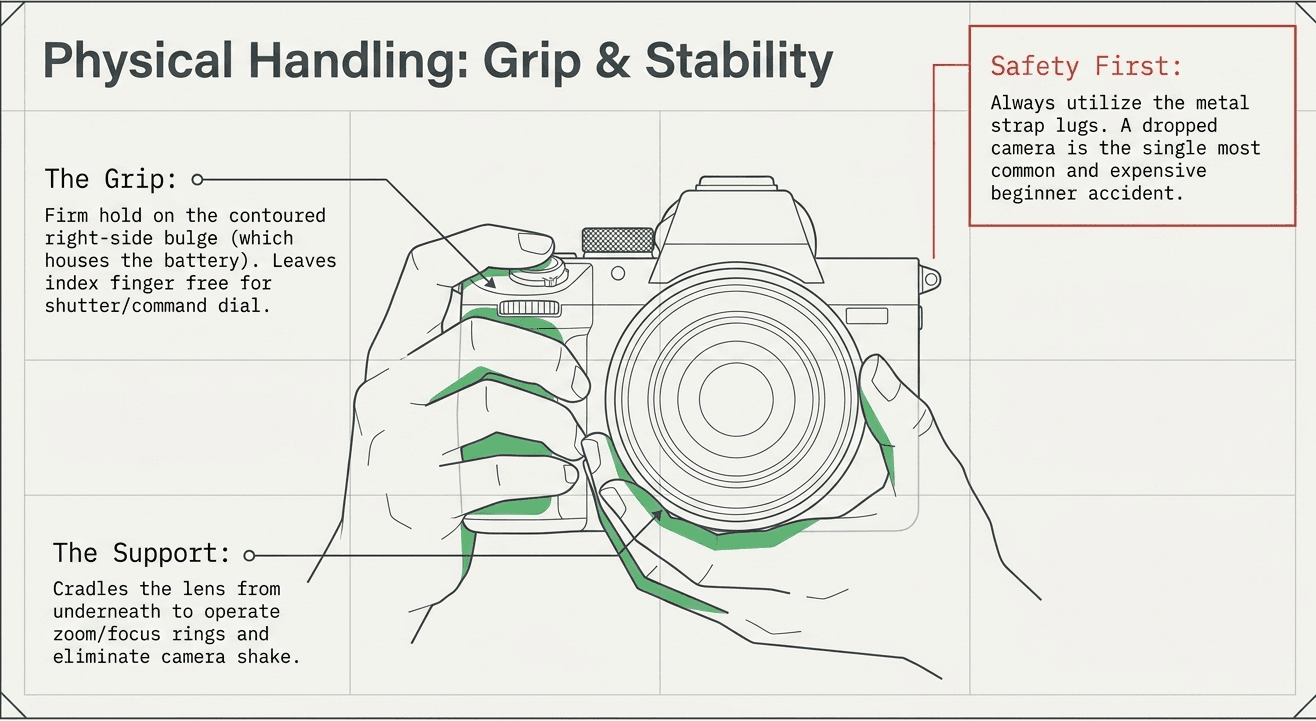
The contoured bulge on the right side of the body isn't just ergonomic — it houses the battery compartment on most cameras, and it's engineered to let you hold the camera securely with one hand while your left hand supports and operates the lens. A proper grip is half the battle in avoiding camera shake.
6. The hot shoe
The small bracket on top of the camera, usually front of the mode dial, where you can mount an external flash, an on-camera light, or a microphone for video work. "Cold" until something is attached — no built-in electronics fire on their own.
7. The strap lugs
The small metal loops on either side of the body where you attach your camera strap. Simple, but worth mentioning — always use one when learning. A dropped camera is the single most common (and expensive) beginner accident.
8. The command dial(s)
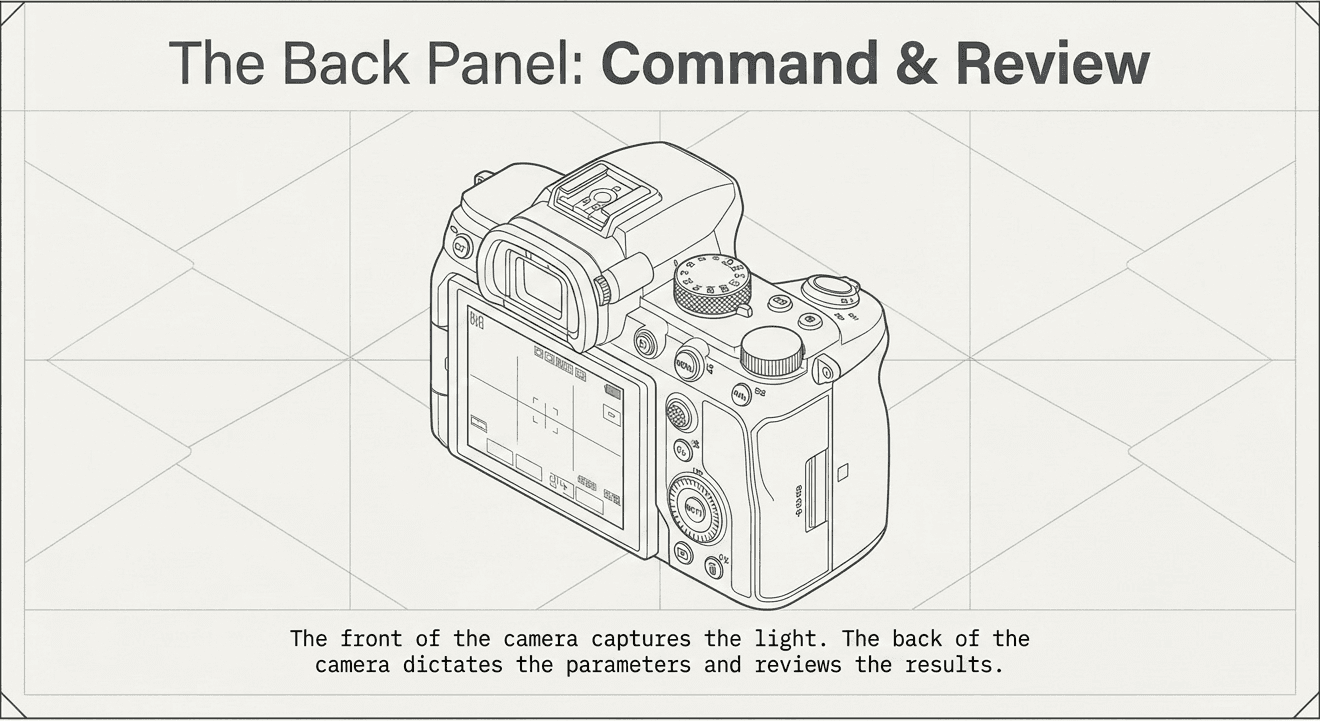
Usually a small wheel near your right thumb or index finger, sometimes two. In Manual mode, this is what you'll be turning constantly to adjust aperture or shutter speed without taking your eye off the viewfinder. Learning to operate this dial by feel — without looking down — is a genuine milestone in getting comfortable with a camera.
What's on the back: the screen and menu buttons
Flip the camera around and you'll find the second half of the control system:
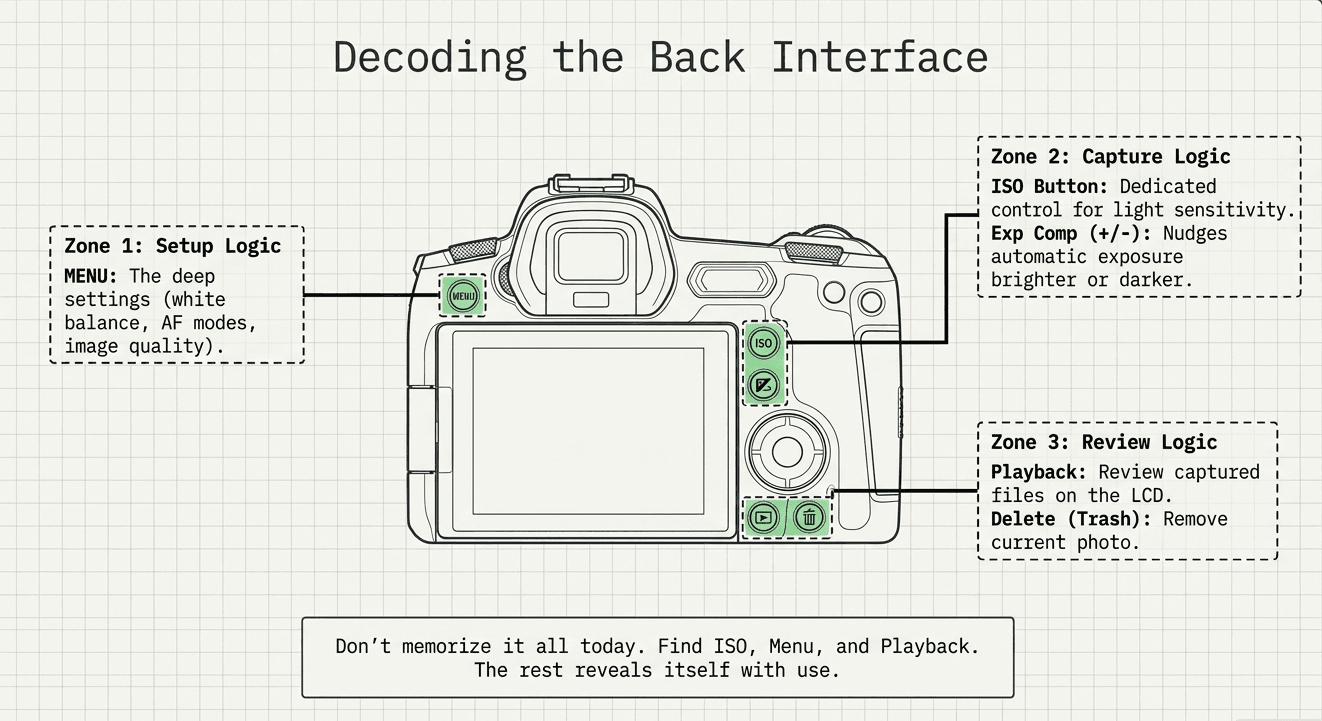
- LCD screen — shows your live preview, your captured images in playback, and your menu system
- Menu button — opens the full settings menu, where deeper controls like white balance, autofocus mode, and image quality live
- Playback button — review photos you've already taken
- Delete/trash button — removes the currently viewed photo
- ISO button — often a dedicated button on more advanced bodies, since ISO is adjusted so frequently
- Exposure compensation dial (+/-) — nudges the camera's chosen exposure brighter or darker without leaving Auto-adjusted modes like Aperture or Shutter Priority
You genuinely don't need to memorize the entire back panel today. Learn where ISO, playback, and menu live first — the rest reveals itself with use.
A beginner drill: learn your camera blind
Before your next shoot, try this at home, camera in hand, no photo required:
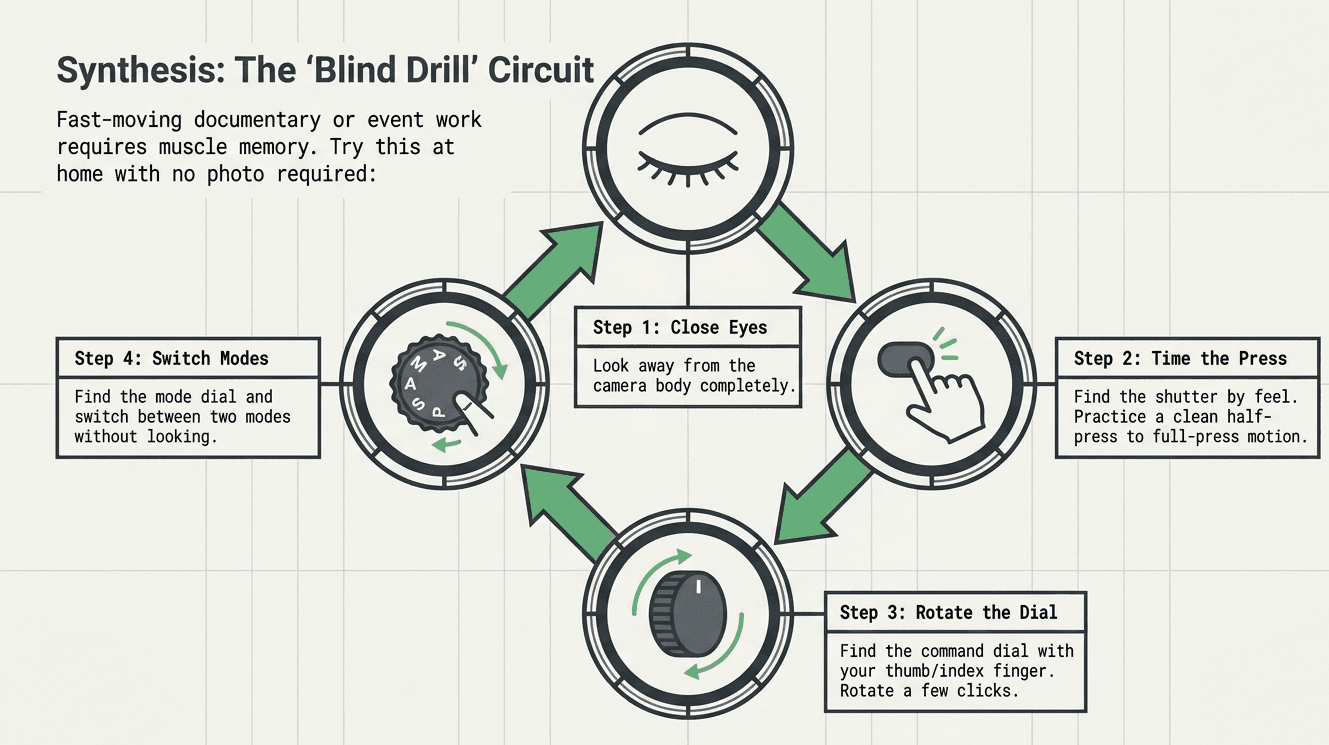
- Close your eyes (or look away from the camera entirely).
- Find the shutter button by feel, and practice a clean half-press to full-press motion.
- Find the command dial with your thumb or index finger and rotate it a few clicks.
- Find the mode dial and switch between two modes without looking.
This sounds almost silly, but it's exactly what working cinematographers and photographers can do without thinking — because in a real shoot, especially fast-moving documentary or event work, you rarely get the luxury of looking down at your camera to find a button.
What comes next in this series
- Manual, Aperture Priority, Shutter Priority, Auto — which mode you should actually shoot in, and why
- RAW vs JPEG — why every serious photographer shoots RAW
- How to Hold a Camera Properly — fixing blurry photos at the source
Learn your camera hands-on at Zyamaru Films Academy
Reading a labeled diagram gets you halfway there. The other half is muscle memory — and that only comes from shooting under guidance until these controls stop feeling foreign. At Zyamaru Films Academy in Tahachal, Kathmandu, our Basic Photography to Cinematography course puts a camera in your hands from day one, with an industry-active instructor correcting your grip, your settings, and your instincts in real time.
Turn Passion Into Profession.
Frequently asked questions
Do all cameras have the same buttons in the same places?
The core controls — shutter button, mode dial, command dial, menu button — exist on nearly every camera, but their exact position varies by brand and model. The function stays consistent even when the layout doesn't.
Which camera button should a beginner learn first?
The shutter button's half-press/full-press behavior, followed by the mode dial. These two controls alone let you start practicing focus and exposure basics before touching anything else.
Is it okay to keep my camera on Auto mode while I'm learning where the buttons are?
Yes, briefly — use Auto mode for a day or two purely to get physically comfortable holding the camera and locating controls. Move to Aperture Priority or Manual mode as soon as you're ready to actually start learning exposure.